Oak - Batten - PAR - 45 x 21mm
Product Code: C-000459£72.73 per m² ex. vat
Lengths available:
- 2100mm
- 2400mm
- 2700mm
- 3000mm
- 3300mm
- 3600mm
- 3900mm
Enter your cladding area for estimate price:
Area
Price (Based on 2400mm)
Contact our experts for a price including delivery and recommended fixings:


We believe in the power of premium materials to transform spaces, inside and out.

We strive to deliver your products as promptly as possible, so you can start enjoying them right away.

Our customers are at the heart of everything we do. That’s why we are proud to showcase our Trustpilot reviews.

Shopping with us is straightforward and stress-free. Our dedicated team is just a call or email away if you need assistance.
- Dimensions: 45mm wide x 21mm thick
- Recommended spacing between battens: 10mm
- PAR Batten
- Custom pricing available upon request via the online quote form
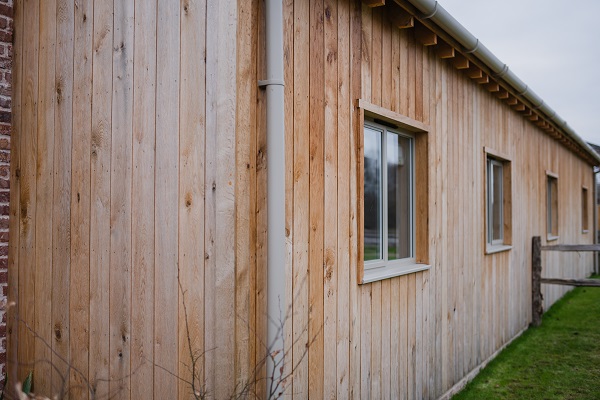
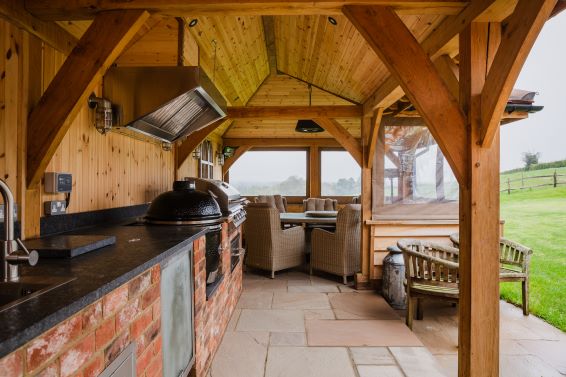
- Perfect for oak-framed structures including buildings, houses, garages, stables, garden rooms, and pergolas
- Crafted from high-quality oak for durability and aesthetic appeal
- Lead time typically ranges from 2 to 4 weeks depending on order specifications
Cladding comes 45mm wide x 21mm thick in set lengths. Pricing for custom items upon request via the online quote form below.
Our well-organized delivery system ensures your hardwood cladding arrives promptly and in pristine condition. Depending on your location, delivery charges are calculated based on the distance, length, and weight of the materials. Whether using external couriers or our own fleet of vehicles, we take every care to ensure your order is handled safely. For more details, please see our Delivery Terms & Conditions.
Guide to Installing Timber Batten Cladding
Timber batten cladding is a stylish and versatile way to add texture and warmth to any façade or interior wall. Proper installation ensures durability, aesthetic appeal, and compliance with building standards. Follow this step-by-step guide:
1. Preparation
- Check the Surface: Ensure the wall or frame is straight, dry, and structurally sound.
- Moisture Barrier: Install a breathable membrane or vapour barrier to protect against moisture ingress.
- Battens & Spacing: Decide on batten size and spacing (commonly 10–30 mm gaps). Mark layout lines for consistency.
2. Tools & Materials
- Timber battens (pre-treated for durability)
- Stainless steel or galvanized screws/nails
- Spirit level and chalk line
- Drill and driver
- Spacers for uniform gaps
- Protective finish (oil, stain, or sealant)
3. Installation Steps
Step 1: Fix Support Battens
- Attach vertical or horizontal support battens to the wall using corrosion-resistant fixings.
- Ensure they are level and spaced according to your design.
Step 2: Position Timber Battens
- Start from one corner or edge.
- Use spacers to maintain consistent gaps between battens.
- Check alignment regularly with a spirit level.
Step 3: Secure Battens
- Fix battens through the thickest section using screws or nails.
- Pre-drill holes to prevent splitting.
- For concealed fixing, use clips or rear-mounted brackets.
Step 4: Expansion Gaps
- Leave a 5–10 mm gap at ends and joints for timber movement.
- Avoid tight joints to prevent warping.
4. Finishing
- Apply protective coating (UV-resistant oil or stain) to enhance longevity.
- Reapply finish periodically as per manufacturer’s recommendations.
5. Maintenance Tips
- Inspect annually for loose fixings or weathering.
- Clean with mild soap and water; avoid harsh chemicals.
- Recoat timber every 12–24 months for optimal protection.
Safety & Compliance
- Follow local building codes and fire safety regulations.
- Use treated timber for external applications to prevent rot and insect damage.
Care & Maintenance Guide for Oak Cladding
Introduction
Oak cladding adds natural warmth and elegance to any building. Whether used indoors or outdoors, proper care ensures longevity, color retention, and structural integrity. This guide covers essential cleaning, protection, and maintenance practices for oak cladding.
1. Initial Treatment
- Apply Protective Finish
Use a UV-resistant oil or stain immediately after installation to prevent discoloration from sunlight. - Seal End Grains
Apply end-grain sealer to reduce moisture absorption and prevent splitting.
2. Regular Cleaning
- Exterior Cladding
Wash annually with mild soap and water using a soft brush. Rinse thoroughly. - Interior Cladding
Dust regularly and wipe with a damp cloth. Avoid harsh chemicals.
3. Protect Against Moisture
- Ensure proper ventilation behind cladding to prevent trapped moisture.
- Check for blocked drainage or ventilation gaps periodically.
4. UV Protection
- Reapply UV-protective oil or stain every 2–3 years for exterior cladding.
- For interior cladding, reapply finish as needed to maintain appearance.
5. Inspect and Repair
- Check for loose boards, cracks, or signs of rot annually.
- Replace damaged boards promptly to prevent further deterioration.
6. Avoid Common Mistakes
- Do not use pressure washers—they can damage the wood fibers.
- Avoid film-forming finishes (like varnish) outdoors; they can peel over time.
Extra Tips
- For a natural silver-grey weathered look, skip UV protection—but expect faster color change.
- Use stainless steel fixings to prevent staining from rust.
Pros & Cons vs Thermo-Treated Timber
Pros
- Rich, natural appearance.
- Can be refinished for a fresh look.
- Adds premium value to property.
Cons
- Requires more maintenance than thermo-treated timber.
- Sensitive to UV and moisture without proper protection.